A game with "Apple Catch" like gameplay. (part 1)
Setting up the game:
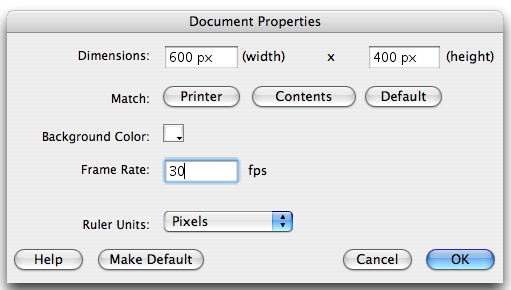
- Open a new Flash document and make the document setup 600 pixels wide and
400 pixels high. Also set your framerate to 30 frames per second.
- Our game will need 4 distinct screens, in this case we need an introduction/splash
screen, an instructions screen, a screen for the actual game, and a game over
screen. So let's add enough keyframes to our timeline to handle this. At this
point we have only one layer on our timeline and four keyframes. Label the
first keyframe "introduction", the second keyframe "instruction",
the third keyframe "game" and the fourth keyframe "game_over".
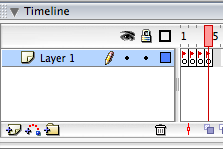
You can change the name of the frame in the Properties panel.

- Introduction Screen: Here we'll want a graphic to represent
what the game is all about. We will also need some buttons. In this case we
will want to have an "Instructions" button, and a "Play Game"
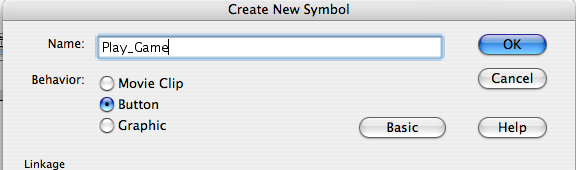
button. To create a button, from the main menu, select "insert",
then "New Symbol". Now select "button" and give your button
a name and hit "OK".
Now we are inside of our new button. This button will be the "Play Game"
button. Each button has four states, however only three are visible when you
publish your Flash movie. "Up", Over", "Down" are
visible and "Hit" is not.
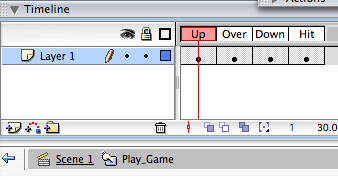
The shape that you define in the "Hit" frame is the "clickable"
area of that button. Remember, once you've design your first state of the
button, you can click that frame in the timeline and copy it and paste it
in the other frames/states and then make adjustments to those other states
instead of creating it each time. Design the button as you wish, once you've
created all four states we are ready to move on and build another button.
The next button will be our "instructions" button. Once this button
is finished it is time to create a graphic for our introduction screen.
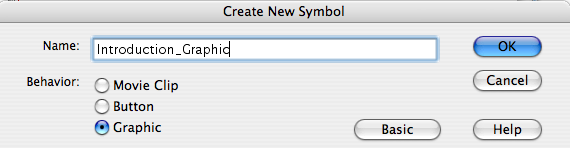
- Introduction Screen Graphic(s):: We want to make a graphic
that we will later place on our intro screen. From the main menu, select "Insert",
then "New Symbol". Select "Graphic" and give it a name
and hit "OK".
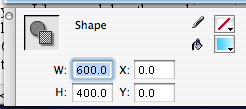
Now we are inside of this new graphic element. Design it so it fits the size
of your Flash document, 600px wide and 400 px high. Set the x,y origin at
0,0 which means it will be in the top left of your graphic. Name the layer
we have now in the graphic "background". Now with the rectangle
tool, make a rectangle that is 600px X 400px with the top left at 0,0. This
shape can be a solid fill or a gradient. Now, lock the background layer, and
add a new layer and start drawing. You can use as many layers you want to
help keep track of all the elements in your graphic. For example, a cloud
can be on it's own layer, a tree on it's own layer, etc... Also, you can incorporate
your title into this graphic. Put that on it's own layer(s).
Once you've completed this graphic, navigate your way back to the main timeline
by clicking on the button (clickable area) labeled "Scene 1"

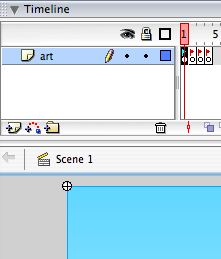
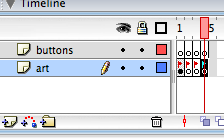
- Placing the Introduction Screen Graphic: In the only layer
on your timeline, change it's name to "art". Click on the first
frame in the timeline called "intro". Open up your Library and drag
the graphic you just created for the intro-screen onto the stage. Align it
to the stage by setting it's x and y coordinates to 0,0 (the top left).
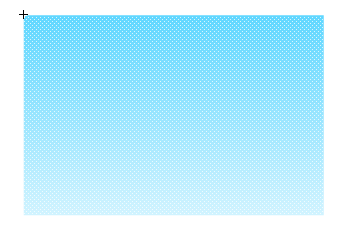
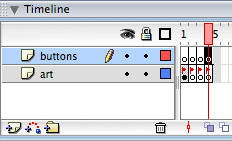
 The image to the left
only shows the upper left corner of the placed graphic.
The image to the left
only shows the upper left corner of the placed graphic.
 This shows where to adjust
the X and Y coordinates.
This shows where to adjust
the X and Y coordinates.
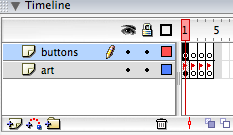
- Adding buttons: Add a new layer to the main timeline and
a keyframe in that layer for each frame that exists in the "art"
layer. Click on the first frame of the "buttons" layer in the main
timeline and drag the "Instructions" and the "Play Game"
buttons onto the stage and position them as you wish.
- Once you have everything placed on the Introduction Screen ("Play Game"
and "Instructions" buttons, your graphic(s) and title treatment
as well as any additional information you would like to include, most likely
your name so you can take credit for your work.), you are ready to start working
on the other three frames on the main timeline and the elements needed for
them.
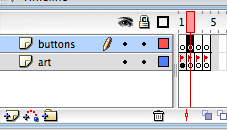
- Instructions Screen: Here you will want to create a graphic
for the background as well as two buttons. One button will be needed to return
to the "introduction" screen, and the other will be to proceed to
the "game" screen. When you've finished making these items, drag
the buttons onto the stage, but be certain you clicked on the second frame
in the buttons layer so everything ends up on the right frame, in the right
layer.
Also, drag the background graphic to the stage and make sure it is on the
art layer in the second frame. Now, proceed to the next step.
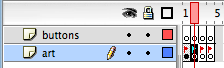
- Game Screen: You will need the following graphic elements;
the falling object(s), your background, and your item that you will use to
collect the falling objects. Create the background graphic following the same
procedure as your Introduction Screen Graphic. Now for the falling object(s)
and your object you'll use to collect the following objects use the following
method to create them. First, from the main timeline (make sure you are not
inside any library item at this time), from the main menu, select "insert",
then "New Symbol". Now select "Movie Clip" and give your
button a name and hit "OK". Draw each of the objects just as you
would draw a graphic item. The only difference between the "Graphic"
and "Movie Clip" properties are that a "Movie Clip", which
we will refer to as an MC from here on out, can accept code and can have as
many frames with nested elements such as sound, other MCs, and graphics. We
will get more in depth on this later. Once these items are completed, only
drag the background graphic to the stage. be sure you have clicked on the
frame 3 of the art layer. Do not do anything with your two MCs yet.
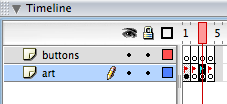
- Game Over Screen: Here you will also want to create a background
graphic and one button that will be used to return to the "introduction"
screen. When these elements are complete, drag them from the library to the
stage. Make sure they end up in the correct frames, on the correct layers.
Buttons on the buttons layer in the fourth frame.
Background art will be on the art layer in the fourth frame.
- When all of the above steps are complete. We will
move on to the next lesson.