Introduction to Flash MX
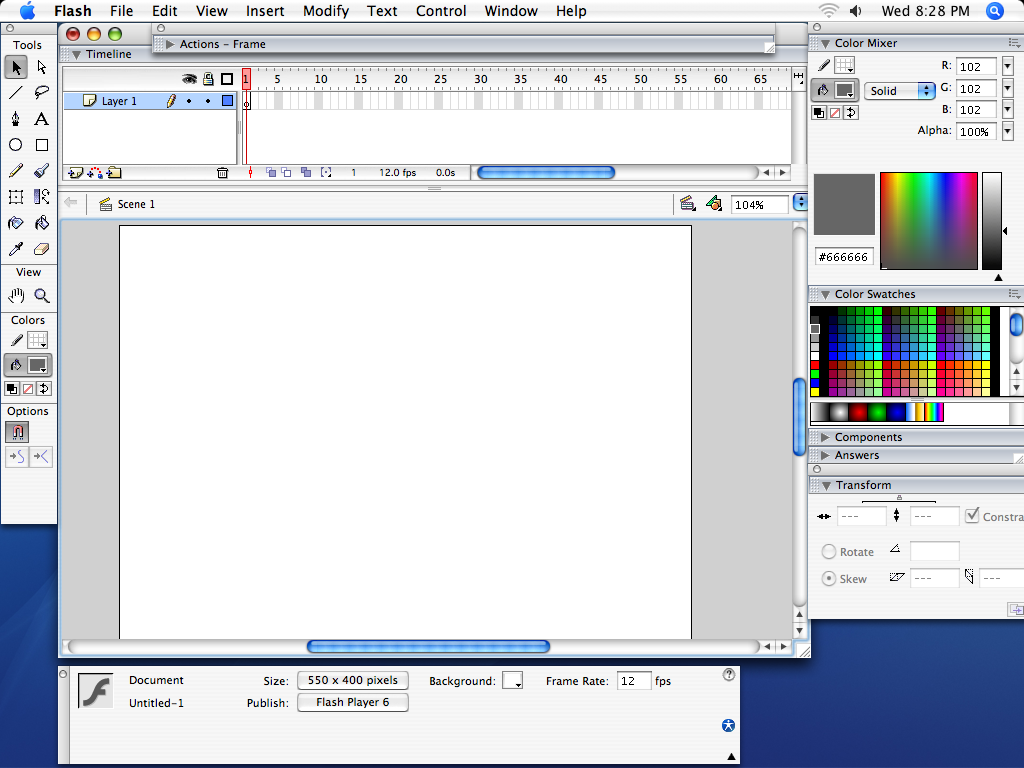
Below is the Flash MX interface.
TOOL PALLET
Let's get familiar with the Flash MX tool pallet. It can be seen on the left
hand side of the screen. Below the different tools are labeled.
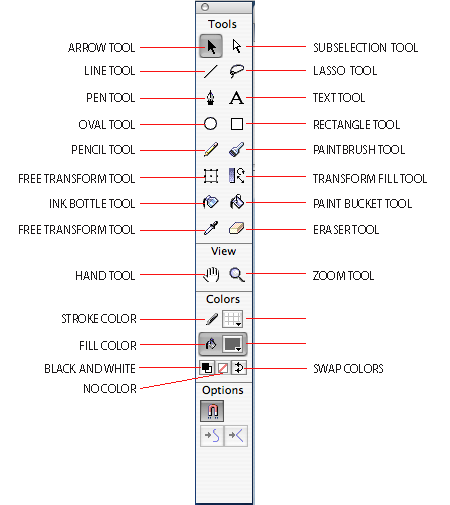
Below, each tool is briefly explained.
- ARROW TOOL: Use this to select an object or a group of objects.
- SUBSELECTION TOOL: Use this tool to select a line segment or point, or a subselection from a group of items.
- LINE TOOL: Use it for drawing lines. Holding the "SHIFT" key while
drawing a line keeps a straight line.
- LASSO TOOL: Can also be used to select an object or part of an object(s).
- PEN TOOL: Used for drawing vector objects, objects made up of points connected
by lines/curves.
- TEXT TOOL: For creating text boxes and selecting text.
- OVAL TOOL: For making ovals/circles. Holding "SHIFT" while making
an oval creates a perfect circle.
- RECTANGLE TOOL: For making rectangles/squares.Holding "SHIFT"
while making rectangle creates a perfect square. You also have the option
of having rounded corners.
- PENCIL TOOL: For drawing lines/curves.This only creates
a stroke. There are several different stroke styles which can be changed in
the "PROPERTIES" panel. Also the point size of the stroke can be
adjusted, making it wider or narrower.
- PAINTBRUSH TOOL: For drawing shapes. This only creates a fill.
- FREE TRANSFORM TOOL: For transforming a shape/object.
- TRANSFORM FILL TOOL: To adjust the fill of an object.
- INK BOTTLE TOOL: When applied to a shape it adds a stroke
to that shape.
- PAINTBUCKET TOOL: When applied to a shape it changes the
fill color. Works on an object that has a stroke around it, if the stroke
runs most of the way around it, you can adjust the "gap size", it
tells the paintbucket to fill something in even if it isn't entirely enclosed
by a stroke.
- EYEDROPPER TOOL: Used to match a color from a fill or stroke
of another shape/line/object.
- ERASER TOOL: Does a good job erasing.
- HAND TOOL: Allows you to drag the stage/pasteboard around
so you can see areas without scrolling.
- ZOOM TOOL: Allows the user to zoom in/out on the stage/pasteboard.
Holding "OPTION" switches to zoom out mode.
- STROKE COLOR: Color of line or stroke.
- FILL COLOR: Color of a fill.
TIMELINE
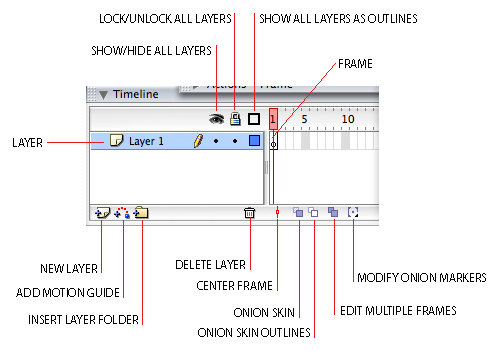
With the TIMELINE we are going to concern ourselves with layers and frames.
To rename a layer, double-click in the area that has the text "Layer 1" or whatever
layer number it is and then type the name you wish to have. As far as frames
go, when you want to introduce an object, whether from the library or if you
want to create it right there on the stage, select the keyframe you wish to
place the item in, if it doesn't yet exist, you will need to add a keyframe
(a frame that will have something different in it than the frame that preceeded
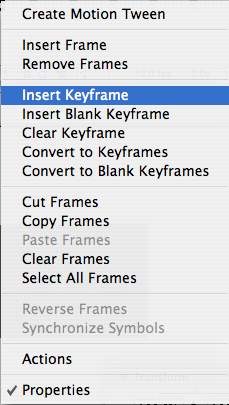
it on the timeline). To add the keyframe, you can right-click on the cell in
the timeline where you want to place the keyframe, and select "Insert Keyframe"
from the menu. If you want an item to be gone from the stage after a certain
point in the TIMELINE, then you will insert a blank keyframe from that same
menu at that point in the timeline. Also by taking another look at the menu
below, we see that we can copy and paste frames, as well as clear them. Sometimes
a frame will have code applied it it rather than an item( an item being art
or text or both). We will address code, refered to in Flash as ActionScript,
in a future lesson.